VERTIGO PROPOSAL BY SCOTT HOEKSTRA
February 7, 2010
VERTIGO PROPOSAL BY WILLEM SPAN
February 7, 2010
VERTIGO PROPOSAL BY YICHUNG HUANG
February 7, 2010
VERTIGO PROPOSAL BY MIKE VAN DE VLIET
February 7, 2010
the passage
February 3, 2010
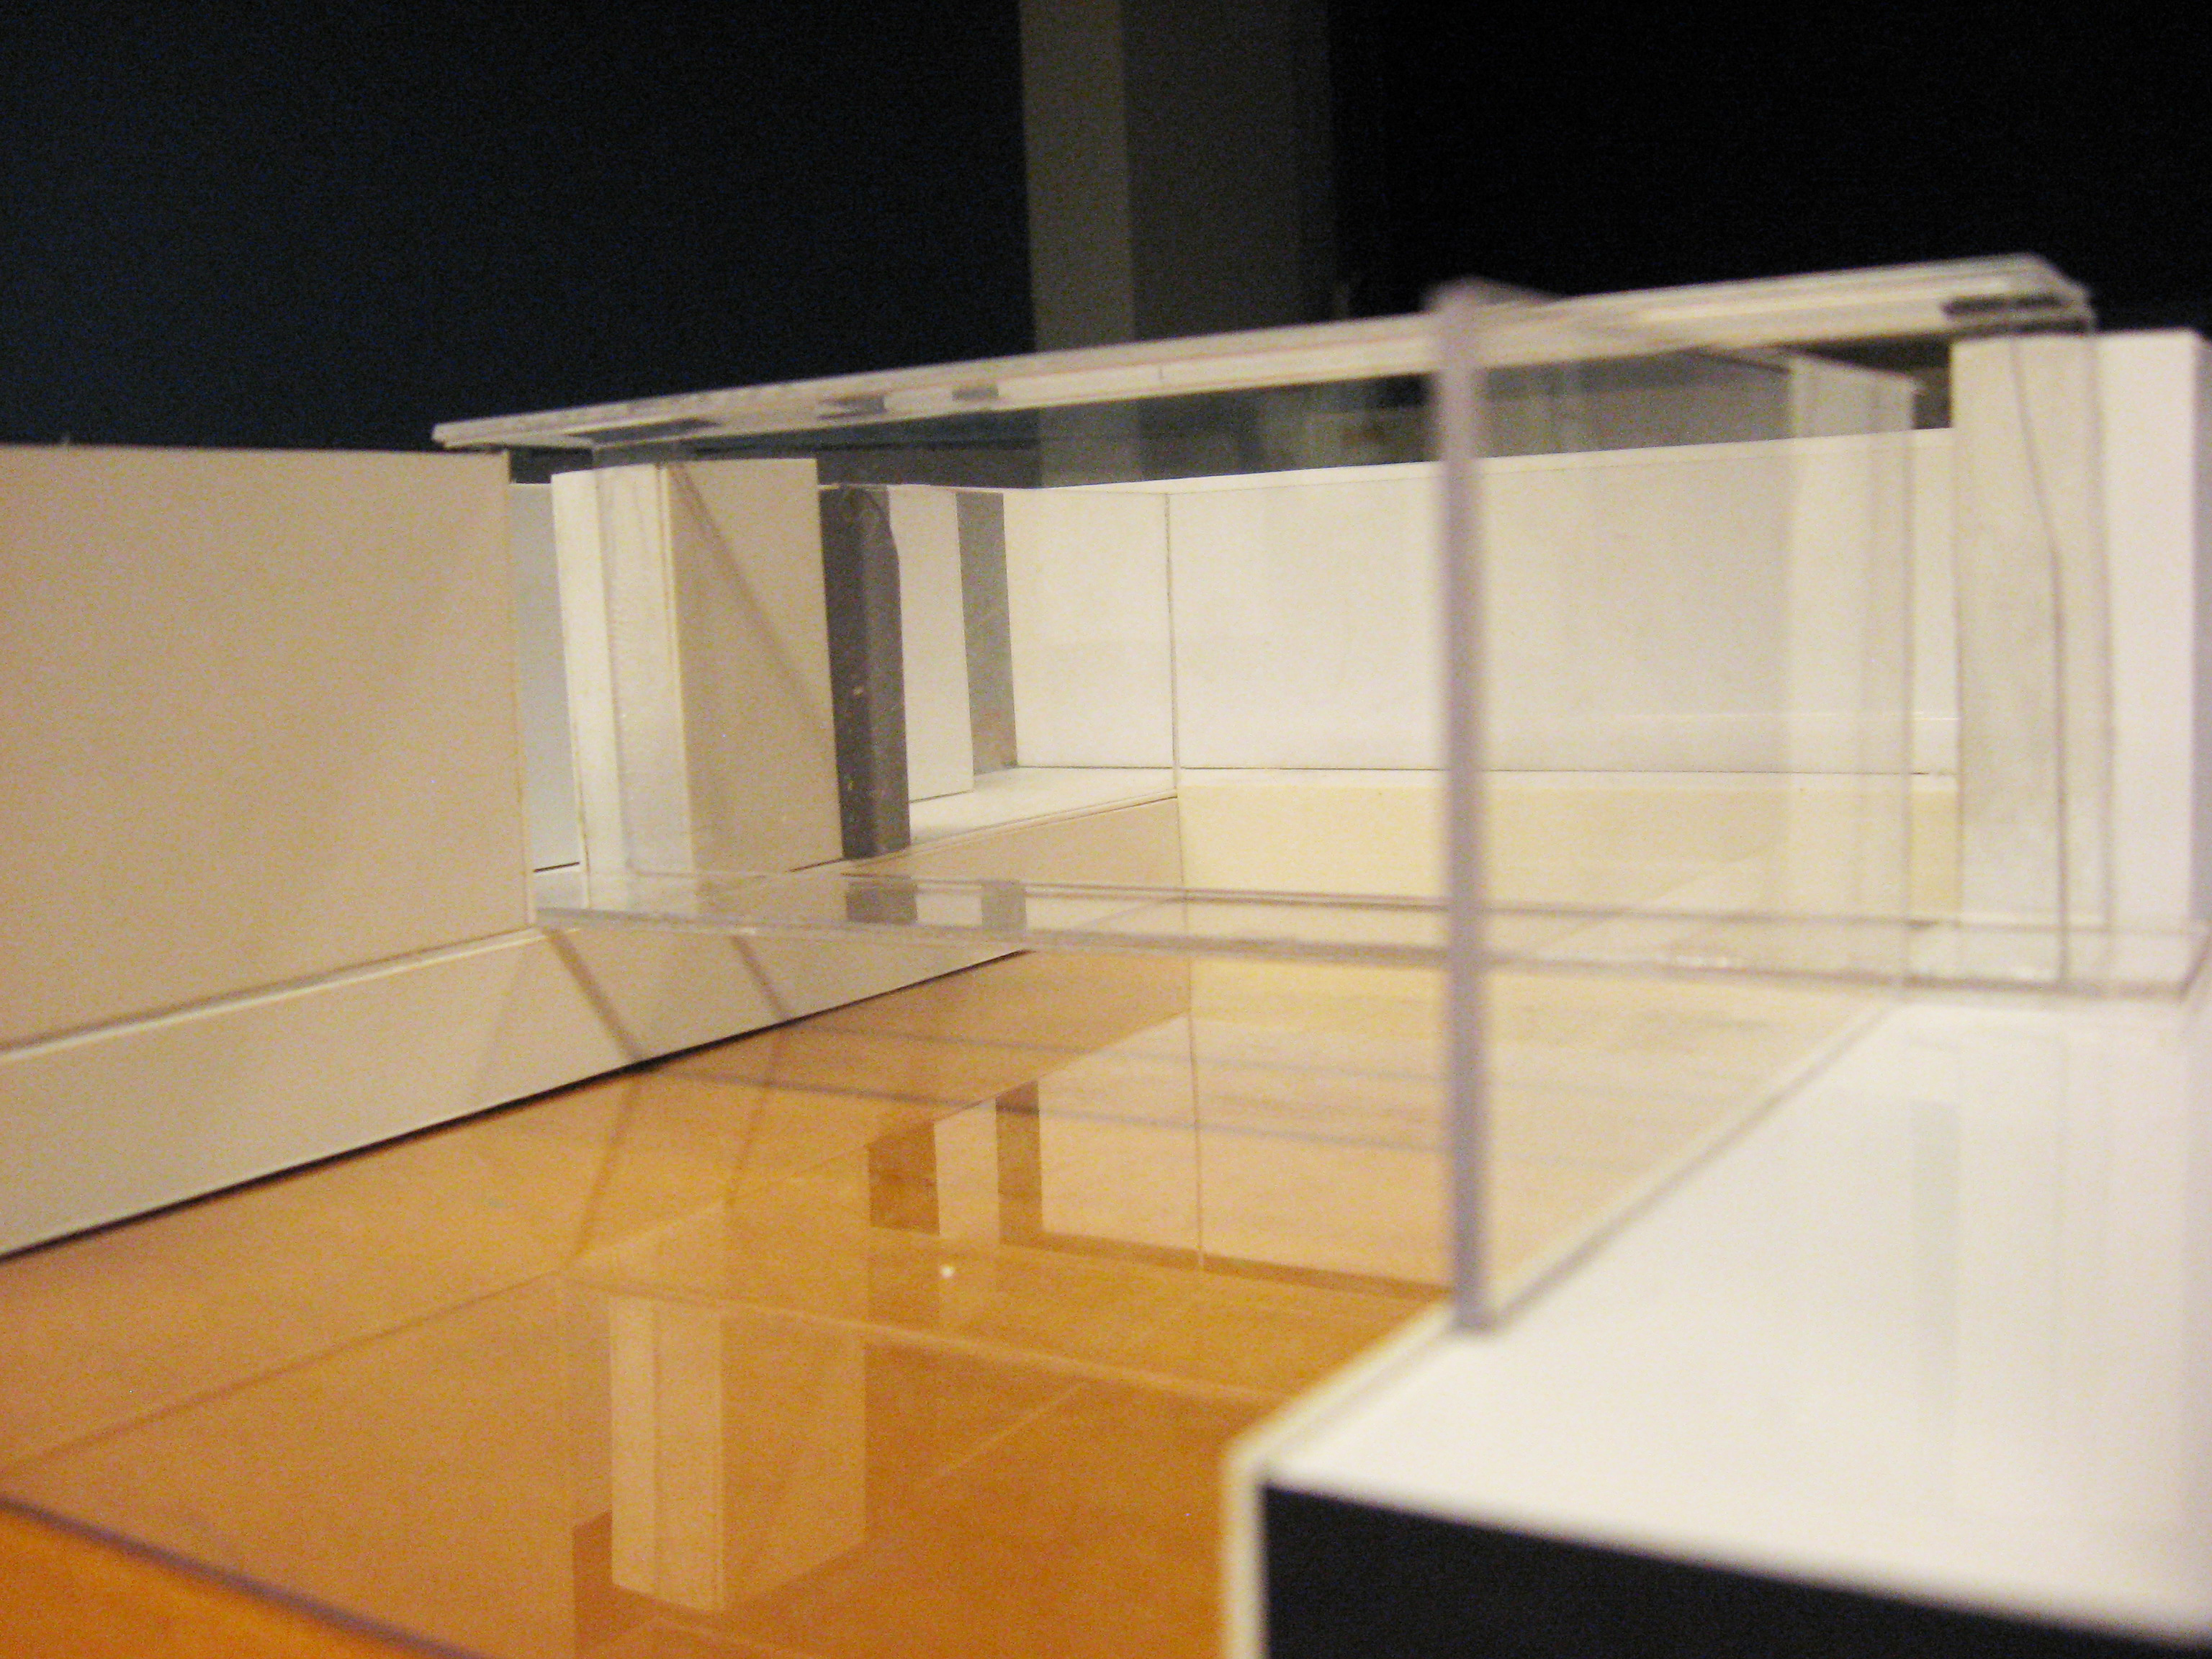
The passage: situated at the city hall of the hague, it forms a glass bridge between the two wings of the building. The picture shows the way to approach the hallway. The way towards the bridge has no windows and is dressed in peaceful shapes and colors on the wall, to make the observer calm and unaware of his soon to come experience. It is a bit dark in this part of the way. Then at the end when the observer turns right he is suddenly confronted with the hallway: completely of glass, so that the sudden amount of light, height, openess and environment should overwhelm him. Hostile shapes with aggressive colours can be placed near this expereance, to make the transition even more sudden. This is the vertogo effect. Although it is just a hallway its specs and placement give it an unique experience. If the user keeps walking he should be a bit dazzled by his environment.


Fabrication of the wave model
February 1, 2010
I decided to make an actual model of the proposed idea. The idea of a wave bursting over a wall. Down blow on this blog some research about production method can be found.
First I made a box representing the wall in the proposed idea. After the fabrication research I decided to try to make the model using different materials, pressing and crunching them into shape.
I tries different translucent materials, like PETG (also known as Perspex) at different thicknesses. But this material tended to break before it was in the desired shape. It just wasn’t flexible enough. I even tried kitchen sealing foil. But this wouldn’t keep its shape or it was so much compressed it became a white ball.
After trying these different materials a came upon cellophane foil, we also discussed in a meeting. This material worked quit well, but also was hard to keep in its shape. I had to stuff most of the sheet (which was 100x60cm.) into the box to keep it in shape. That is why the overhang of the wave in the picture isn’t very much.

When I put the lights under it, it did give a very interesting effect. The folded, crunched and mangled material reflects the light just like an ice mass. Because the material mangles in angled planes it looks just like the internal cracks in an ice mass. I also used this in the final model.


But pressing and crunching sheet material into shape didn’t seem to be the best option to make the form. They just didn’t hold their shape, or they collapsed under their own weight.
So I tried a different technique, vacuum forming. I used this technique because it seemed a good chose after the research, and it is available to me at the faculty.
I first glued some purple foam blocks onto each other so I could make the wave shape from it. Then I used a saw, chisels, files, sanding paper, knives etc. to carve the shape.

The guys at the work shop advised me to punch holes in all the concave areas of the shape, so the machine could suck all the air from underneath it. So I did.

After coating the foam shape in Vaseline so the foam and the plastic wouldn’t merge, it was time for the vacuum forming. A 2mm sheet of PETG was advised by the workshop guys, but unfortunately it tore because the material was stretched too far.

I had to cut away the covering material without damaging the foam shape, and try again. The second time we used a thicker sheet (3mm). This one held it, barely though.
Now the shape was made a had to take out the foam. But because the shape is undercut, working like a barb hook, I had to cut it all out. A labor intensive job.
The shape came out quite well. The texture of the foam even left a bumpy effect resembling water. I cut the shape to fit the box and tried the effect it had with the light under it.


Then I thought I could combine the two effects of the vacuum form and the mangled sheet. I stuffed the vacuum form with one of the cellophane sheets, and it gives a great effect.
That is how I made my final model, I hope you like it. I certainly am pleased with the result.


But pressing and crunching sheet material into shape didn’t seem to be the best option to make the form. They just didn’t hold their shape, or they collapsed under their own weight.
vertigo passage
January 30, 2010
The end concept is a combination of Idea 3 and 5, as presented before. The context is that of the city hall of den Haag, which is an ideal building to place the concept as a connection between the two wings. The height and lightness of the environment suit the project fine. It is a glass passage, as explaned in idea 3-5:
Idee 3: het derde concept speelt in op de perceptie van openheid en hoogte. Het concept vind zich plaats hoog in een flatgebouw. Een overloop tussen twee kamers is volledig van glas: vloer, plafond en zijwanden. Door de gang smal te houden forceert de situatie de persoon zich naar buiten te richten, de openheid in. De glazen stulp geeft de illusie van openheid, transparantie, een brede horizon, terwijl het natuurlijk een gesloten, smalle gang is tussen twee kamers. Een bijkomend effect is dat letterlijke vertigo in deze situatie ook kan optreden, de glazen ondergrond geeft natuurlijk de illusie van het afwezig zijn van de vloer en een vrije val.
Idee 5: het laatste concept speelt tevens in op het gevoel van paranoïde. Dit scenario speelt zich af tussen drie glazen gangen tussen twee kamers. De passanten in de middelste gang zullen zich bekeken voelen door de passanten van de andere twee gangen, die de ervaring van observator hebben.
the location of the project:


inside or outside the frame
January 29, 2010
The context / scenario: 5*5*5m exhibition room in shopping-mall.

Main theme: vertigo / potempkin
As explained in the previous blog, the main idea is the potempkin & vertigo theme. To summarize my understanding about the theme, I would say it is about the frame (the scope of vision), or the phenomena people see. Thus, it is crucial for my project to illustrate the existing and feeling of the ‘border’. With the discussion with teacher and colleagues, drama / theatre stage is the best stepping-stone to achieve the feeling of ‘border’. The argument is that the ‘border’ will be given more sense of reality by letting the user feel they are ‘inside’ or ‘outside’ the frame. As a result, I developed the scene of ‘being on the stage’ and ‘seeing the stage’ on two façade.


The contrast between two walls.


Besides the scene of ‘being on the stage’ (being inside the drama) and ‘seeing the stage’ (watching the drama), the second difference between these two façades, is the fact of perception. The façade on the left hand side seems possible to walk out of the stage, but actually it is just the effect of visualization. Conversely, on the right hand side of the wall, there are also tricks of illusion (‘the droste effect’ and perspective), but this time there is an invitation to the audience to walk on the stage simply as that.
Spherical Vertigo Potemkin
January 29, 2010
After looking for a potemkin idea for the 5x5x5 box i delved more into the vertigo aspect of the theme. I came across a kinetic / op-art work by Jose Soto called London Scribbles in the National Gallery Victoria, Melbourne which was a moment of serendipity for me.

Op-Art is an art-style that makes use of strong contrast colored surfaces which are meant to create a sense of depth and thus create an illusion of a 3rd dimension. (image: Bridget Riley, Movement in Squares)

In case of the London Scribbles there is also the kinetic part which gives one the sense of movement. The illusion is caused by the first layer of stripes that creates a tension with the second layer of steel wiring in front. The black wire connects the black lines behind which moves with the slightest movement of the head and creates an optical fascination. I’ve tried to recreate the artwork’s illusion by making one of my own.

The next step involved making an object with the same kinetic / op-art trickery that one could experience from different angles or even enter. I thought of an installation made out of steal rods in a kind of ‘swirl’. I got me a chaotic ensemble of vertical lines at different distances creating an optical overwhelm.


I realized it contained a certain vertigo effect but not the static / kinetic movement in the same instance. I needed to bring back the principal of two layers interacting. Hence i came up with the following: a rational striped sphere with the chaotic black lines in front, giving this vertigo optical tension, and a potemkin sense of movement.


Creating te wave
January 26, 2010
Creating the wave
Rapid prototyping
In the different solution possibilities I thought of rapid prototyping. This technique is used to create quick models/prototypes and one off products. After some research on the possibilities of these techniques it seems like it could be an option for a scale model. A life size model of meters is too big to be created in the machines.

For the effect it is crucial to have a transparent material. I didn’t know if this was possible. But after some internet surfing I found there can also be prototyped in ABSi, which is a translucent plastic. This may work for a small model. To have a transparent effect the wall thickness can’t be too thick.
Vacuum forming
This process makes hollow shapes. A layer of (clear) plastic is heated and put over a mold. By sucking all the air out between the layer and the mold a thin-walled copy of the mold forms. There are restrictions to this process. The size of the object is a factor. Also therecan’t be any undercuts in the form, because the material will not follow the form and is difficult to remove.

Ice Sculpting
With ice sculpting incredible forms are possible to make. Virtually every form is possible and at any size you want. As long as you have the time and skill, or the money.
Using this techniq

ue the effe ct will be optimal. But of course there are some down sides; ice sculptures are very expensive and demand a lot of labor. Next to that they do not last in hot rooms. A solution would be to keep the room cold, but then the effect would be less because people could expect the water to be frozen.
Forming with r esin
I looked at th e technique o f resin forming. It is used to create a variety of shapes. The end product can be as clear as glass. I even found someone that made a waveform of it.
All the examples I found where fairly small. I don’t know the size limitation of this technique, but for a scale model it is certainly an option.

Flowing water over a frozen object
I couldn’t think of another possibility to create the wave, so I started googling. I found a picture of rain instantly freezing onto a car and some benches. This creates quit the same effect as the frozen waterfalls. Maybe it is possible to make a basic wave form out of a metal, cool it down to sub zero temperature and layer by layer drip water over it. Of course the same problem as you have with the ice sculpture will occur, it will melt. Unless it is cooled in some kind of way.
But I think it is more easy to do than the ice sculptures, even on full scale. But the result will be less beautiful. 
 Ice Sculpting
With ice sculpting incredible forms are possible to make. Virtually every form is possible and at any size you want. As long as you have the time and skill, or the money.
Using this technique the effect will be optimal. But of course there are some down sides; ice sculptures are very expensive and demand a lot of labor. Next to that they do not last in hot rooms. A solution would be  to keep the room cold, but then the effect would be less because people could expect the water to be frozen.
